
Kitchen Cabinet Makeovers That Won't Drain Your Savings Account
Kitchen Cabinet Makeovers That Won't Drain Your Savings Account
You know that feeling when you're mindlessly scrolling through Pinterest at 2 AM and suddenly find yourself bookmarking dozens of kitchen transformations? Yeah, we've all been there. Those stunning before-and-after photos make it look like magic – one minute you're staring at cabinets that belong in a 1985 time capsule, and the next, you're looking at something straight out of a design magazine.
But here's the thing nobody talks about: you don't need to win the lottery or take out a second mortgage to get the kitchen you're lusting after. Sure, those TV makeover shows make it seem like you need a complete gut job, but the real secret weapon in kitchen transformations? Your cabinets.
Think about it – when you walk into any kitchen, what's the first thing your eyes land on? Those cabinet doors and drawers take up serious visual real estate. Give them some TLC, and suddenly your entire kitchen looks like you hired a professional designer. Whether you're dealing with those honey oak monstrosities from the '90s or boring builder-grade boxes that scream "generic," there's a cabinet makeover strategy that'll work for your budget and skill level.
The Real Deal on Kitchen Cabinet Renovation Costs
Let's cut to the chase and talk money, because nobody wants any nasty surprises halfway through tearing apart their kitchen. Kitchen cabinet renovation runs the gamut from "weekend project with leftover birthday money" to "maybe I should refinance the house."
At the low end, you're looking at maybe $300-800 for a basic paint job and some snazzy new hardware. This works great when your cabinet boxes are solid and you just hate looking at them every morning. The middle ground – cabinet refacing or doing a partial replacement – usually runs somewhere between $4,000 and $12,000. Then there's the "go big or go home" option where you replace everything, which can easily hit $25,000 or more if you get fancy with it.
But here's what drives me crazy about most budget advice – they never mention all those little expenses that sneak up on you. Quality primer alone can run $50-100. Decent brushes, sandpaper, TSP cleaner, drop cloths, painter's tape – suddenly you've spent another $200-300 just on supplies. Add in a drill bit set for hardware installation or rental fees for a palm sander, and you're looking at hidden costs that can really add up.
My advice? Whatever number you land on, bump it up by at least 25%. Trust me on this. You'll discover you need wood filler for those mysterious cabinet door dings, or realize your existing hinges look ridiculous with your new style, or find out that one cabinet door is slightly warped and needs replacing. That buffer saves your sanity and your marriage.
Don't forget about the time factor either. A "quick weekend paint job" realistically takes two weeks when you factor in proper prep, drying time between coats, and actually having time to do the work around your regular life. If you're paying someone else, factor in their schedule too – good contractors stay busy, especially during peak renovation season.
Getting Your Game Plan Together
Before you start ripping cabinet doors off their hinges in a fit of renovation enthusiasm, pump the brakes and make a solid plan. I've seen too many people jump into cabinet projects without thinking it through, only to end up with half-finished kitchens and a pile of regret.
Start with a brutally honest assessment of what you're working with. Open every single cabinet door and drawer. Check for loose hinges, wonky drawer slides, or any water damage around the sink area. Solid wood or good plywood cabinets are renovation gold – they can handle whatever you throw at them. But if you're dealing with particle board that's already showing its age, especially around water sources, you might be better off replacing rather than renovating.
Be real about your lifestyle too. If you're constantly digging through cabinets looking for stuff, a pretty paint job isn't going to solve your storage nightmares. This might be the perfect time to add some organizational solutions or even rethink your cabinet layout entirely.
Timeline matters more than people think. That weekend warrior mentality sounds great until you're living with a torn-apart kitchen for three weeks because the paint didn't cure properly or your hardware order got delayed. If you're going the DIY route, plan for things to take twice as long as you think they will.
Take a million photos before you start. Seriously. You think you'll remember how that weird corner cabinet goes back together, but you won't. Create a project folder with measurements, paint colors, hardware specs, and contact info for everyone involved. Future you will thank present you when you're standing in Home Depot trying to remember which exact shade of white you picked.
Consider the bigger picture too. Are you planning to sell in the next couple years? A massive renovation might be overkill. Staying put for the long haul? This might be the time to invest in exactly what you want, even if it costs a bit more.
The Paint Route: Biggest Bang for Your Buck
Painting cabinets remains hands-down the cheapest way to completely transform your kitchen, but don't let anyone fool you into thinking it's easy. This isn't slapping some paint on a bedroom wall – kitchen cabinets take serious abuse from grease, steam, and constant handling.
The prep work makes or breaks this project. Remove all the doors and drawers – yes, all of them. Label everything with painter's tape so you don't spend three hours trying to figure out which door goes where. Clean everything with TSP (trisodium phosphate) or a heavy-duty degreaser. Pay special attention to anything near the stove, where grease buildup can sabotage paint adhesion.
Sanding isn't optional, despite what those "no-sand primer" advertisements claim. Light sanding with 150-grit paper gives your primer something to grab onto. Follow up with 220-grit for smoothness. Wipe everything down with a tack cloth afterward – any dust that remains will show up in your finish like a sore thumb.
Primer choice is crucial for kitchen cabinets. Skip the cheap stuff and invest in a high-quality bonding primer designed for slick surfaces. This step prevents your paint from chipping off every time someone slams a cabinet door. And let's be honest – someone's always slamming cabinet doors.
When picking paint colors, think long-term. Those trendy sage green cabinets flooding Instagram look amazing right now, but will you still love them in five years? Classic neutrals like creamy whites, soft grays, and navy blues have serious staying power. That said, if a bold color makes you smile every time you walk into your kitchen, go for it. Life's too short for boring cabinets.
Application technique matters big time. High-quality synthetic brushes beat rollers for cabinet doors – they leave fewer texture marks. Work in thin, even coats, and don't try to cover everything in one pass. Plan for at least two coats, maybe three if you're going from dark to light.
Temperature and humidity can mess up your paint job in ways you wouldn't expect. Ideal conditions are 65-75°F with low humidity. Paint applied in high humidity might not cure properly, leaving you with tacky, easily damaged surfaces. Plan your painting schedule around the weather forecast.
Cabinet Refacing: The Sweet Spot Solution
Cabinet refacing provides a sweet spot between affordability and wow factor. You will keep the boxes of your cabinets but update the visible components – doors, drawer fronts, and the face frames will be totally refurbished.
This type of project makes the most sense when you like and can use your current kitchen layout, but the cabinets are dated and you want a fresh style to make it feel new again, or if you have pieced together a kitchen with mismatched cabinets from three or four different updates through the years. Refacing will unify everything with new materials so you can have a cohesive set of cabinets that look like brand new.
Material options have exploded in the past few years. Wood veneer offers you the natural look and can be stained in many colors. Today’s laminates are very realistic and many options mimic the real wood grain so closely, you would likely have difficulty telling the difference. You can choose very high gloss options, or metal finishes for a contemporary kitchen look that take excitement to another level by becoming the feature of the space.
Thermofoil would be another really great option, although it is important to note its an inexpensive option, it will hold up well and clean very easily. This material is vinyl and wraps around the door profile providing a painted look without having to worry about the regular maintenance of paint. Just remember not to put them near heat sources as thermofoil can delaminate around dishwashers and ovens.
The timeline for refacing generally can be from one to three weeks, depending on the size of your kitchen and the lead time for materials. The best part is you can still practically use your kitchen during the process, as opposed to a full cabinet replacement, when you are microwaving everything for a couple of months.
The possibilities of a hybrid option should be considered too. You may need to replace the base cabinets due to water damage, but are happy with the uppers and just want to reface them, or you may want to change a few more cabinets for better storage and refacing the rest.These techniques will help maximize your money and meet targeted needs.
When creating custom touches it can make a basic refacing feel special. The addition of a crown molding, new door styles, and glass fronts can create the sense of added architectural interest without being a full custom replacement.
Hardware: The Jewelry of the Kitchen
Never underestimate the power of updated cabinet hardware. You can completely change the look of your cabinets for less than $300. It's like you got a kitchen for the price of a couple of dinners out.
Trends currently swing toward longer pulls and more robust knobs, but ultimately go with what looks right based on the proportions of your cabinets and what feels better in your hand. Bar pulls do great on drawers - the longer the pull, the more modern look you're achieving. For upper cabinets, knobs often look great where you pull it and don't need as much leverage.
Finish coordination is more important than we might think. Your cabinet hardware should complement (not necessarily match) with the finish on your faucets, light fixtures and appliance finishes. Mixed metals can look amazing when you are intentional with how you mix them, but random mixing often screams "I shopped at five stores."
Brushed nickel is classic and timeless, while matte black adds drama while fitting with most everything. Brass has some warmth and sophistication. Chrome can feel crisp and traditional. Oil-rubbed bronze adds rustic charm, but let me tell you, it fingerprints like crazy!
The difference between an amateur look and a professional looking finish lies in minor installation precision. There is nothing like crooked or erratically spaced hardware that conjures the worst DIY disaster in your mind. Make a template (not to be confused with a stencil) that leaves you with proper and consistent spacing between pieces of hardware - generally, hardware is centered on smaller doors and drawers or roughly 1/3 from the edge on larger doors. Quality is critical when it comes to cabinet hardware. Solid brass or stainless construction will last for decades, but hollow or plated options will fail in just a few years. The range in cost between items is often nominal; however, the difference in life expectancy is great.
Soft close hinges and soft close drawer slides are excellent upgrades that make your cabinets function better while also improving their perceived value. Soft close prevents slamming, reduces the wear and tear on your cabinets, improves the overall experience for the homeowner, and are a legitimate upgrade. Up front costs will be higher than non-soft close options, but the upgrade can appreciably impact your home through value appreciation.
Color Psychology and Current Trends
Color choices will change how you feel in your kitchen and how it operates, sometimes to an extent you wouldn't expect. Lighter colors will allow spaces and surfaces to feel larger and brighter, while darker colors create feelings of intimacy and warmth. There is some psychology too.
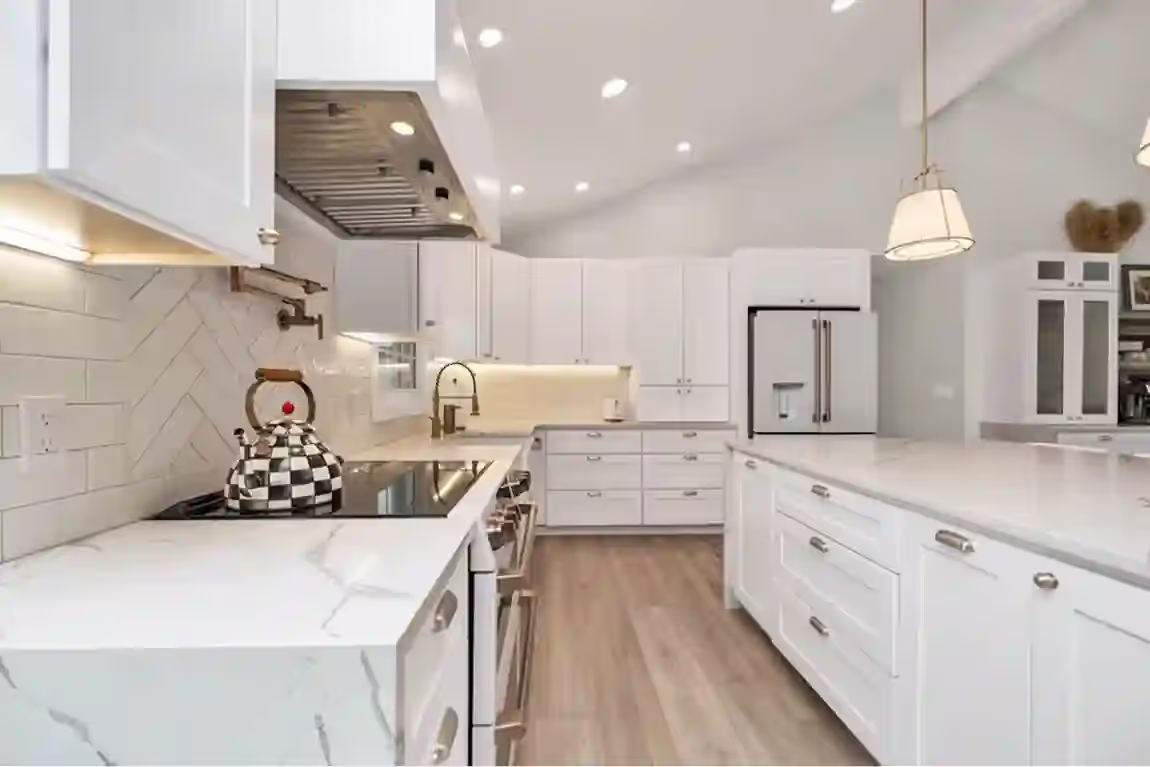
White cabinets are ubiquitous in kitchens because they are timeless, allow other things in your house to feel much bigger, and provide an incredible neutral background. However, pure white cabinets do not have a warm feeling and may feel sterile or cold in some houses. Instead, look for warmer white options that have subtle undertones and hopefully complement your existing lighting and other finishes.
Gray is still very much the color of choice in the neutral space that gives you sophistication without the starkness of white. Lighter grays can create a bright and fresh modern home, while dark charcoal gray can create drama. Cooler grays tend to be beautiful with stainless steel, while warmer grays will look sharp with brass and copper accents.
Navy blue can provide richness without the maintenance of black, especially when used on an island or a lower cabinet with white or lighter upper cabinet.Deep blues are timeless but feel fresh — they won't feel old five years from now. Green has also emerged as a significant trend in kitchens — from a softer sage to a more vivid emerald — the selection of earth tones creates calmness and organic feelings when paired with natural elements incorporated throughout and stone countertops. Green often feels contemporary without feeling trendy in the "that's so last year" type of way.
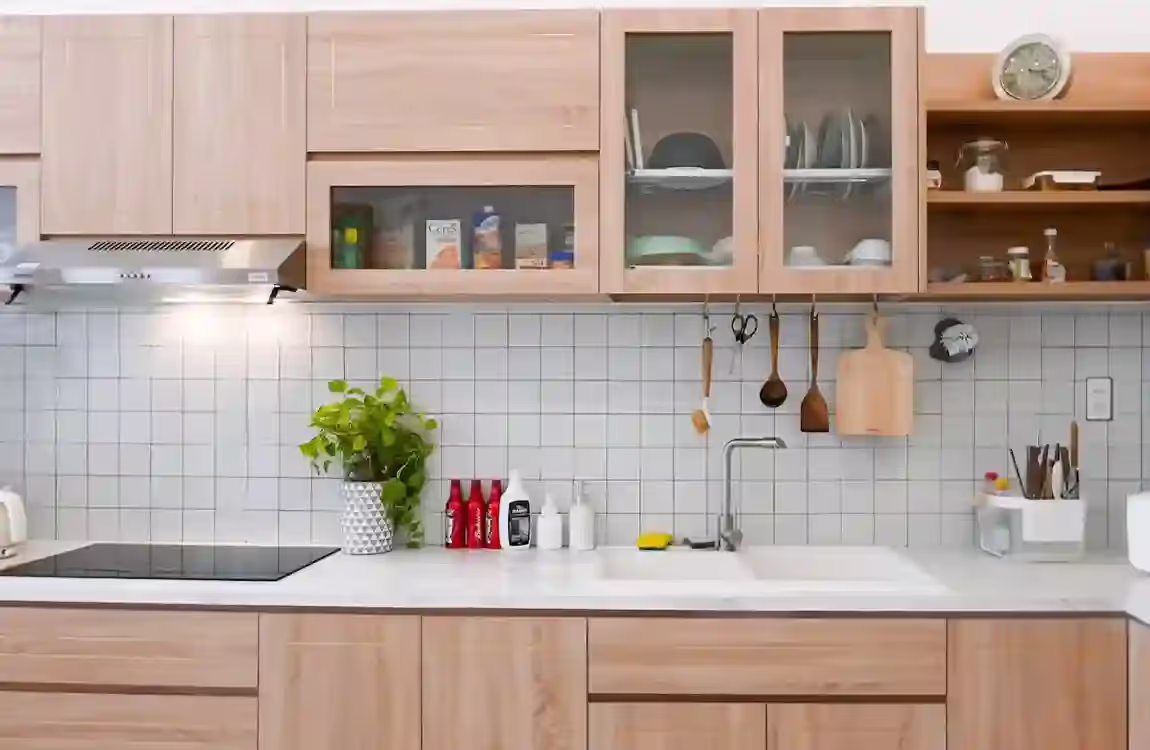
Two-tone designs provide visual interest without being overwhelming in small spaces. A popular combination is white uppers with navy lowers, or natural woods with painted bases. This design feature can also help create the illusion of higher ceilings, or create better visual balance in kitchens with odd shape and proportions.
You should also consider your kitchen lighting in color selection. More specifically, does your kitchen Bay or face in a North or South direction? If your kitchen is North facing, you should plan to use warmer colors for your cabinets to reduce the cooler, natural light. If your kitchen is South facing, it can have more cool colors without becoming too cold. Lighting type will also affect the way colors are perceived. For example, warm LED lights favour reds and yellows, while cooler LED lights favour blues and greens.
Advanced Colour Techniques:Beyond Paint , Stain or Lacquer
Color blocking can introduce subtly refined visual interest by providing contrast using colour in helpful and strategic ways. For example, colour blocking can make small kitchens feel larger, or provide clearer definitions between provided designs in kitchens that are open concept and require better visual separation.
Horizontal colour blocking is generally when upper and lower cabinets are painted in different-coloured paints. Similar to vertical colour blocking, this technique can allow ceilings to always appear higher and allow for better visual grounding when odd sizes and proportions exist.
The secret to successful colour blocking is to choose a colour scheme using colours that complement each other, rather than compete against each other. The 60-30-10 rule often works well here: The dominant colour will cover about 60% of cabinet colours, a secondary colour would cover 30% of colour, and any accent colours should only be assigned 10% of the facings.
Three colours can work too, especially for larger kitchens that may have an island in a coordinating third colour, but this must be planned carefully to avoid the illusion of chaos. You can use sample boards to create the pattern above instead of just going for one colour scheme, and to make sure everything works together as a whole before commitments are made.
Texture blocking (as opposed to just colour ) provides yet another dimension. For example, it is easier to create visual interest by blocking smooth surfaces (like painted surfaces) from natural wood grain surfaces, whether they involve lacquer, or painting or obviously by differentiating between a matte finish and a high-gloss aesthetic where in a monochromatic environment alone textures will provide the main contrast.
Going Vertical: Maximizing Height
In contemporary kitchen renovation projects, cabinet design is trending toward extending cabinets to the ceiling, eliminating the gap above standard cabinets that collects dust. Ceiling-high cabinets look more custom and up to date, while offering additional storage space.
When you do have cabinets that are not totally to the ceiling, crown molding can be used to fill the space between your cabinets and the ceiling. If you are using crown molding, be sure that it touches the ceiling -- a floating crown looks unfinished and pointless! We encourage you to select molding profiles that fit with the overall architectural style of the kitchen.
Additionally, if you want to make a more significan impact, consider adding small cabinets or open shelves above existing cabinets. The additional storage will be awesome for less frequently used items - holiday dishware, small appliances, or bulk storage.
When using cabinet storage that goes to the ceiling, ladder access becomes a consideration. A rolling library ladder can provide functionality and a decorative feature -- however, a library ladder will take a large footprint in your kitchen. Also, consider adding mechanisms to pull down shelving systems at the ceiling that will allow people to access those higher shelves without having a ladder, however, these systems can be very costly.
Considerations for taller cabinets apply to the balance of proportion as well. Standard-height ceilings (like 8 feet), can feel overwhelmed by tall cabinets, while having that same height for 9 feet or higher ceilings would manage those extended cabinets much better. In addition, heavy, more orthodox cabinet styles can feel oppressive when they are extended the whole height of the ceiling, while clean, contemporary cabinet lines are better at absorbing the height.
Lighting: The Game Changer Nobody Talks About
Good lighting is what elevates your renovated cabinets from functional, to spectacular. Undercabinet lighting has become the standard, but the options for available lighting have expanded much beyond fluorescent strips.
LED strip lighting provides energy efficiency and longevity, a benefit that keeps going beyond basic fluorescent strips, all while provide even illumination across your countertop. Many systems have dimming and color changing capabilities that allow you to adjust the ambiance of your kitchen throughout the day.
Interior cabinet lighting creates beautiful display opportunities for glass-front cabinets or open shelves.Small LED puck lights or strips can be used to illuminate dishware, glassware, or other decorative objects.
Toe-kick lighting provides a subtle "floor light" accent, making kitchens feel modern and spacious. This is particularly effective with floating-style base cabinets.
Home automation smart lighting controls can be used to connect cabinet/under cabinet lighting systems into whole-home systems. There are many programming options, including time-of-day dependent light adjustments, or scheduling the cabinet lighting to match other lighting in the kitchen.
Color temperature can significantly change the appearance of refurbished cabinets. Warm light (2700K-3000K) enhances wood tones and creates cozy ambience while cooler light (4000K-5000K) provides much better task lighting. Tunable LED systems let you adjust the color temperature a few times during the day while using the same fixtures.
The Open Shelving Choice
Creating open shelving by removing cabinet doors can be one of the most dramatic alterations for the least amount of money. This is particularly effective with vertically displaying attractive dishes, cookbooks, or decorative objects.
Placement of open shelving is critical - open shelving is most effective in areas where you normally store attractive, commonly used items. Typically beside sinks or close to eating spaces works well in an open manner for conveniently storing dishes.
Try living with just a few open cabinets first before determining if you want them throughout your kitchen. Many people love the expansive feel and accessibility, while others prefer to have the "clutter" hidden out of the way with cleaner lines of solid cabinet doors.
If you love the look of open cabinets, but worry about dusting - glass fronts are a compromise. Clear glass gives you an open look, while still hiding the contents. Frosted or textured glass can hide some clutter, while still feeling less bulky than a solid door.
Styling open shelves requires frequent attention to maintain an attractive packaging appearance.When arranging items by color, height, or function, consistent and visually coherent arrangements are appealing to the eye. Mixing practical items with decorative or display pieces and ensuring there is some empty or negative space to deter clutter is important.
Storage Solutions While Renovating
Cabinet renovation is a great opportunity to revive storage solutions. It is easy to install modern organizational systems and maximise the functionality of cabinets, and they will still look clean.
Pull-out drawers in base cabinets are more accessible than shelves or stationary drawers. They work especially well in corner cabinets that are neglected and used as storage black holes.
Lazy Susans will always be a good solution for corner cabinets, but modern Lazy Susans are more stable and run smoother than previous versions. There are full-extension options that allow easy access to your stored items.
Use vertical, or sideways, dividers to organize baking sheets, cutting boards, or serving trays. These dividers can be integrated into existing cabinets or purchased as aftermarket accessories and are simple to install.
Drawer organizer systems keep utensils, small items, or gadgets organized and at your fingertips. Many systems are adjustable for different drawer sizes and changing storage needs.
Specialized storage options provide solutions to specific kitchen issues. Spice rack systems keep your seasonings organized and accessible. Wine storage options can be added to existing spaces. Appliance 'garages' allow you to store small appliances out of sight yet are endlessly easy to access.
DIY vs. Professional: How to Smartly Choose
Choosing between DIY or professional help is more than just budget, consider your skill level, your time availability, your patience with mistakes, and your level of self-honesty related to all of these.
Tasks like painting, basic hardware installation, and basic organizational upgrades are very DIY-friendly. Most homeowners are likely to have a few necessary tools, these are not expensive tools, and the cost savings provide a nice incentive for those willing to invest the time!Renovation projects are a lot of work and many tasks are too complex for most homeowners to consider doing themselves, including refacing cupboards, electrical work to install lighting, and structural changes. Bad installation decreases the value of your home and may create unsafe conditions.
You may want to consider a hybrid approach. Hire professionals for complex structural work and do things like painting and installing hardware yourself, saving costs while still ensuring quality in the most critical areas.
The tool requirements can differ significantly from one renovation approach to another. For example, painting your cabinets will only require basic tools that most people own. Refacing cupboards may require specialized cutting tools and methods to install the new doors. Professionally replacing cupboards will require professional-grade tools and professional expertise.
Safety is more than just the tools used. Lead paint in older homes must not only be managed properly to be safe, it must be handled according to specific procedures. The dangers involved in electrical work also require working with professional expertise.
Preparation: How To Set Yourself Up For Success
There are more preparations to successfully renovate your cupboards than simply deciding on colours and finishes. You are going to need to plan to adjust your daily routine very significantly to be able to accomplish the amount of work that is required to demolish and install cabinets. You also need to take measures to reduce disruption for your household.
Consider creating temporary options for your food and coffee needs in other areas of your home. Use a small card table with your coffee maker and microwave and all of your kitchen supplies. You should also stock up on paper plates and disposable utensils so you don't have to wash dishes in your bathroom sinks while you are working.
Be sure to use plastic sheeting and catch all drop-clothes to protect any areas that could be getting dusted and dirtied. You will be surprised by how much dust and debris will be generated while demolishing cabinets and sanding before you repaint them and install new hardware.
Consider renting storage containers to place any kitchen supplies and equipment, tools and materials. You want to keep everything in the same location that is well organized and accessible, while allowing room in your home to accomplish your work.
Communicate with any family members who are going to be affected by the renovations. It is in everyone's best interest if everyone understands what is expected of them during the renovation process. Be clear with timelines of disruptions and inconveniences needed to accommodate the renovation to your cupboards.
Pet arrangements are often overlooked.Open work space with paint fumes can be unsafe, and new labour forces can contribute to stress as can noise, Plan ahead for pet care arrangements during the busy work time.
Material Quality: Choosing Quality is a Better Value
When you buy quality materials your renovation purchase will be worth the investment in the long run, that does not have to mean that you are buying the most expensive but, products that are meant for heavy usage in a kitchen.
When buying paint or refinishing work, buy quality primer and paint for cabinets. There is not usually a lot of price difference, but coverage, durability and appearance are going to be significantly better than store paint or refurbishing options.
Your hardware should be solid metal, not hollow or cheap plastic (or hollow cheap plastic). Quality hinges operate smoothly and stay in adjustment for a long time, cheap ones sag and bind quickly.
When you refinish your cabinets you want to choose materials that will withstand kitchen moisture and heat swings. Solid wood veneers give you the best appearance and durability while high grade laminates give you outstanding performance for a fraction of the price.
Do your homework on manufacturer warranties and back up for the products you are interested in. A reputable manufacturer stands behind their products with a real warranty where they communicate back to you in a reasonable time.
Environmental issues are becoming much more important to all consumers. Purchasing, low VOCs paint and finishes improves indoor air quality. Also, sources of sustainable wood and recycled contents will help you make environmentally friendly decisions while maintaining quality.
Having a Timeline Reality Check
Planning a realistic timeline can reduce frustrations and make for a better final product. Most cabinet renewals take longer than originally anticipated especially DIY first timers.
If you are just painting, then plan for one or two weeks if you want to have enough proper drying time between coats. Rushing a project will produce a poor final result that likely will force you to do it over again from the beginning.Cabinet refacing projects usually take two to four weeks to complete, Depending on material lead times and the overall complexity of the kitchen project. Custom doors and drawer fronts can take many weeks for manufacturing plus delivery time.
Complete replacement involves more timing due to cabinet types selected. Stock cabinets install fastest. Semi-custom and fully custom take longer. All projects need to keep in mind that other issues can cause delays due to inspects, delivery time, and unexpected issues.
Take pictures and measurements of everything before work begins and keep track of the changes as you progress. This will serve you well when ordering materials, talking with contractors, or remembering what you put together the first time.
Timing of the season of the project can make a big difference. Renovations during the holiday season can disrupt the daily lives of families. Summer projects are enhanced with availability of outdoor grilling to prepare meals. Winter may provide pro contractors with more availability but material costs also often drop so renovations can be less expensive.
Maintenance: Protecting Your Investment
Correct maintenance ensures the life and good appearance of your renovations and investment. The earlier you establish good cleaning habits, the better chance you have of not letting dirt or grime build up which can damage a finish.
There are no cleaning tasks that require anything more than a little mild soap and water and TLC. Never use anything with chemicals as they can damage paint or other finishes. Make sure that you clean up spills and splatters right away, and be cautious with particularly sticky messes around food-preparation areas (stoves/sinks) where damage will likely occur.
After normal use of kitchen hardware, such as screws used to fasten plates in hinges of doors, check the screws and periodically tighten tracks for all drawers to reduce door sagging and operation issues by making a habit of a quick inspection.
Always keep leftover paint to touch up any small nicks or scratches.In a busy kitchen they are bound to occur; just make sure touch them up promptly to avoid minor repair issues from developing into aggravating disasters.
Again, using the change of seasons helps remind you to recognize that things may be going wrong before they become a very serious issue. Check for loose hinges, check for drawer slides that need replacing, and check out any situations that may be starting with moisture damage.Tackle small things as they come up in order to avoid costly repairs down the road.
Return on Investment: The Numbers Game
Kitchen cabinet renovations tend to give an excellent return on investment if you do not fully remodel your kitchen. Real estate agents often image the kitchen as being the best or most valuable upgrade to a home.
Even inexpensive upgrades like paint or different hardware can add value to a home because when prospective buyers walk into a home, the first thing they notice is the kitchen. Totally remodeled cabinets can provide a good first impression which can influence their entire opinion of the property.
Mid-range cabinet renovations like refacing usually net a return of 60-80% on resale value, whereas a full kitchen renovation often never yields more than 60% on resale for what was spent. For a homeowner considering selling their home, a kitchen cabinet upgrade is smart to make.
Financial returns aside, let’s think about value that still means something each day. If you are going to stay in your home for a few years, then the personal value of having an inviting/likeable workspace in your kitchen may make your investment much better for you as opposed to your financial returns.
Each local market will typically take a large part of your decisions regarding returns on renovations. In a high-end market, buyers are probably expecting high-end finishes, so they tend to be minimally impressed if a modest upgrade occurs. In contrast, a starter home buyer looking at a home with minor updates bringing them up to current standards could have a massive amount of value to them.
Future Trends and Smart Investments
Being in touch with future trends will aid in making sure your renovation stays current for a longer period in your home. You don’t have to follow every trend and you do not necessarily need to come up with a "trendy" kitchen, but being aware of directional changes can help you make smart decisions about the long-term implications.
The trend toward smart home living is a key driver for cabinets, which increasingly are integrated into smart appliances. As charging stations in drawers, automated lighting, and refrigerated storage options start showing up, they will be part of cabinet renovations.Think of infrastructure for potential upgrades you may not do now.
Sustainable materials and sustainable practices continue to gain importance. Buyers care more about sustainable options and choose sustainable cabinets. Sustainable cabinets may provide greater value over time.
Aging-in-place guidelines consider cabinet structure for many homeowners. Universal design principles like variations in counter height and retail storage and working hands- free in storage consideration of changing physical abilities over time.
The influence of technology in kitchen design likely continues and will expand in use. Even if you are not installing a tech option now, electrical access to selected cabinet areas is important. It is much easier to upgrade to future tech when the infrastructure is in place.
Your Kitchen Transformation Journey
Renovating your kitchen cabinets provides an accessible opportunity to achieve your kitchen dreams while avoiding some of the complexities and costs associated with a full kitchen remodel. Whether you embark on your own weekend painting project or opt to go all-in with a total refacing, you will succeed if you plan carefully, source quality materials, and manage your expectations realistically.
Every kitchen is unique, and each renovation will depend on all of your kitchen's particular details, your personal preference, budget, and goals. The first step is to be honest with yourself to make an accurate assessment of your existing cabinets, map out the priorities, and set your budget - with a safety net included because it is likely to be required.
When done with forethought and care, the transformation from old, tired cabinets to new and current ones is awesome! Cabinets can become the lasting foundation of a kitchen that serves your family well for years! And you did not have to blow the budget or put up with months of construction chaos to get to that kitchen.
Be thorough and take time to research all your options without the pressure of making impulsive decisions. Visit showrooms, pick up samples, and live with options that seem possible. Talk to your friends and neighbors who have recently completed these kinds of projects, and listen to their stories - evidence from their personal experience will often complement the opinion of an educated professional.
But also consider the temporary inconvenience as an investment towards enhancing your quality of life every day. When your kitchen is more beautiful and functional, this will make mealtimes more enjoyable, family gatherings a pleasurable experience, and your family kitchen adds real value to your home. And every time you walk into your transformed kitchen, the memories of why you undertook this adventure will become a reality.
The dream kitchen is closer than you might realize, it may still be under outdated paint or behind old hardware. With the right design and approach, and using quality materials and a bit of work you will soon have the kitchen you always wanted by following the strategic cabinet renovation magic.